How To Build a Dashboard With Airsequel and Lowdefy
In this tutorial we will be building a very simple dashboard with Lowdefy. It will load the data via GraphQL from an example SQLite database hosted on Airsequel.
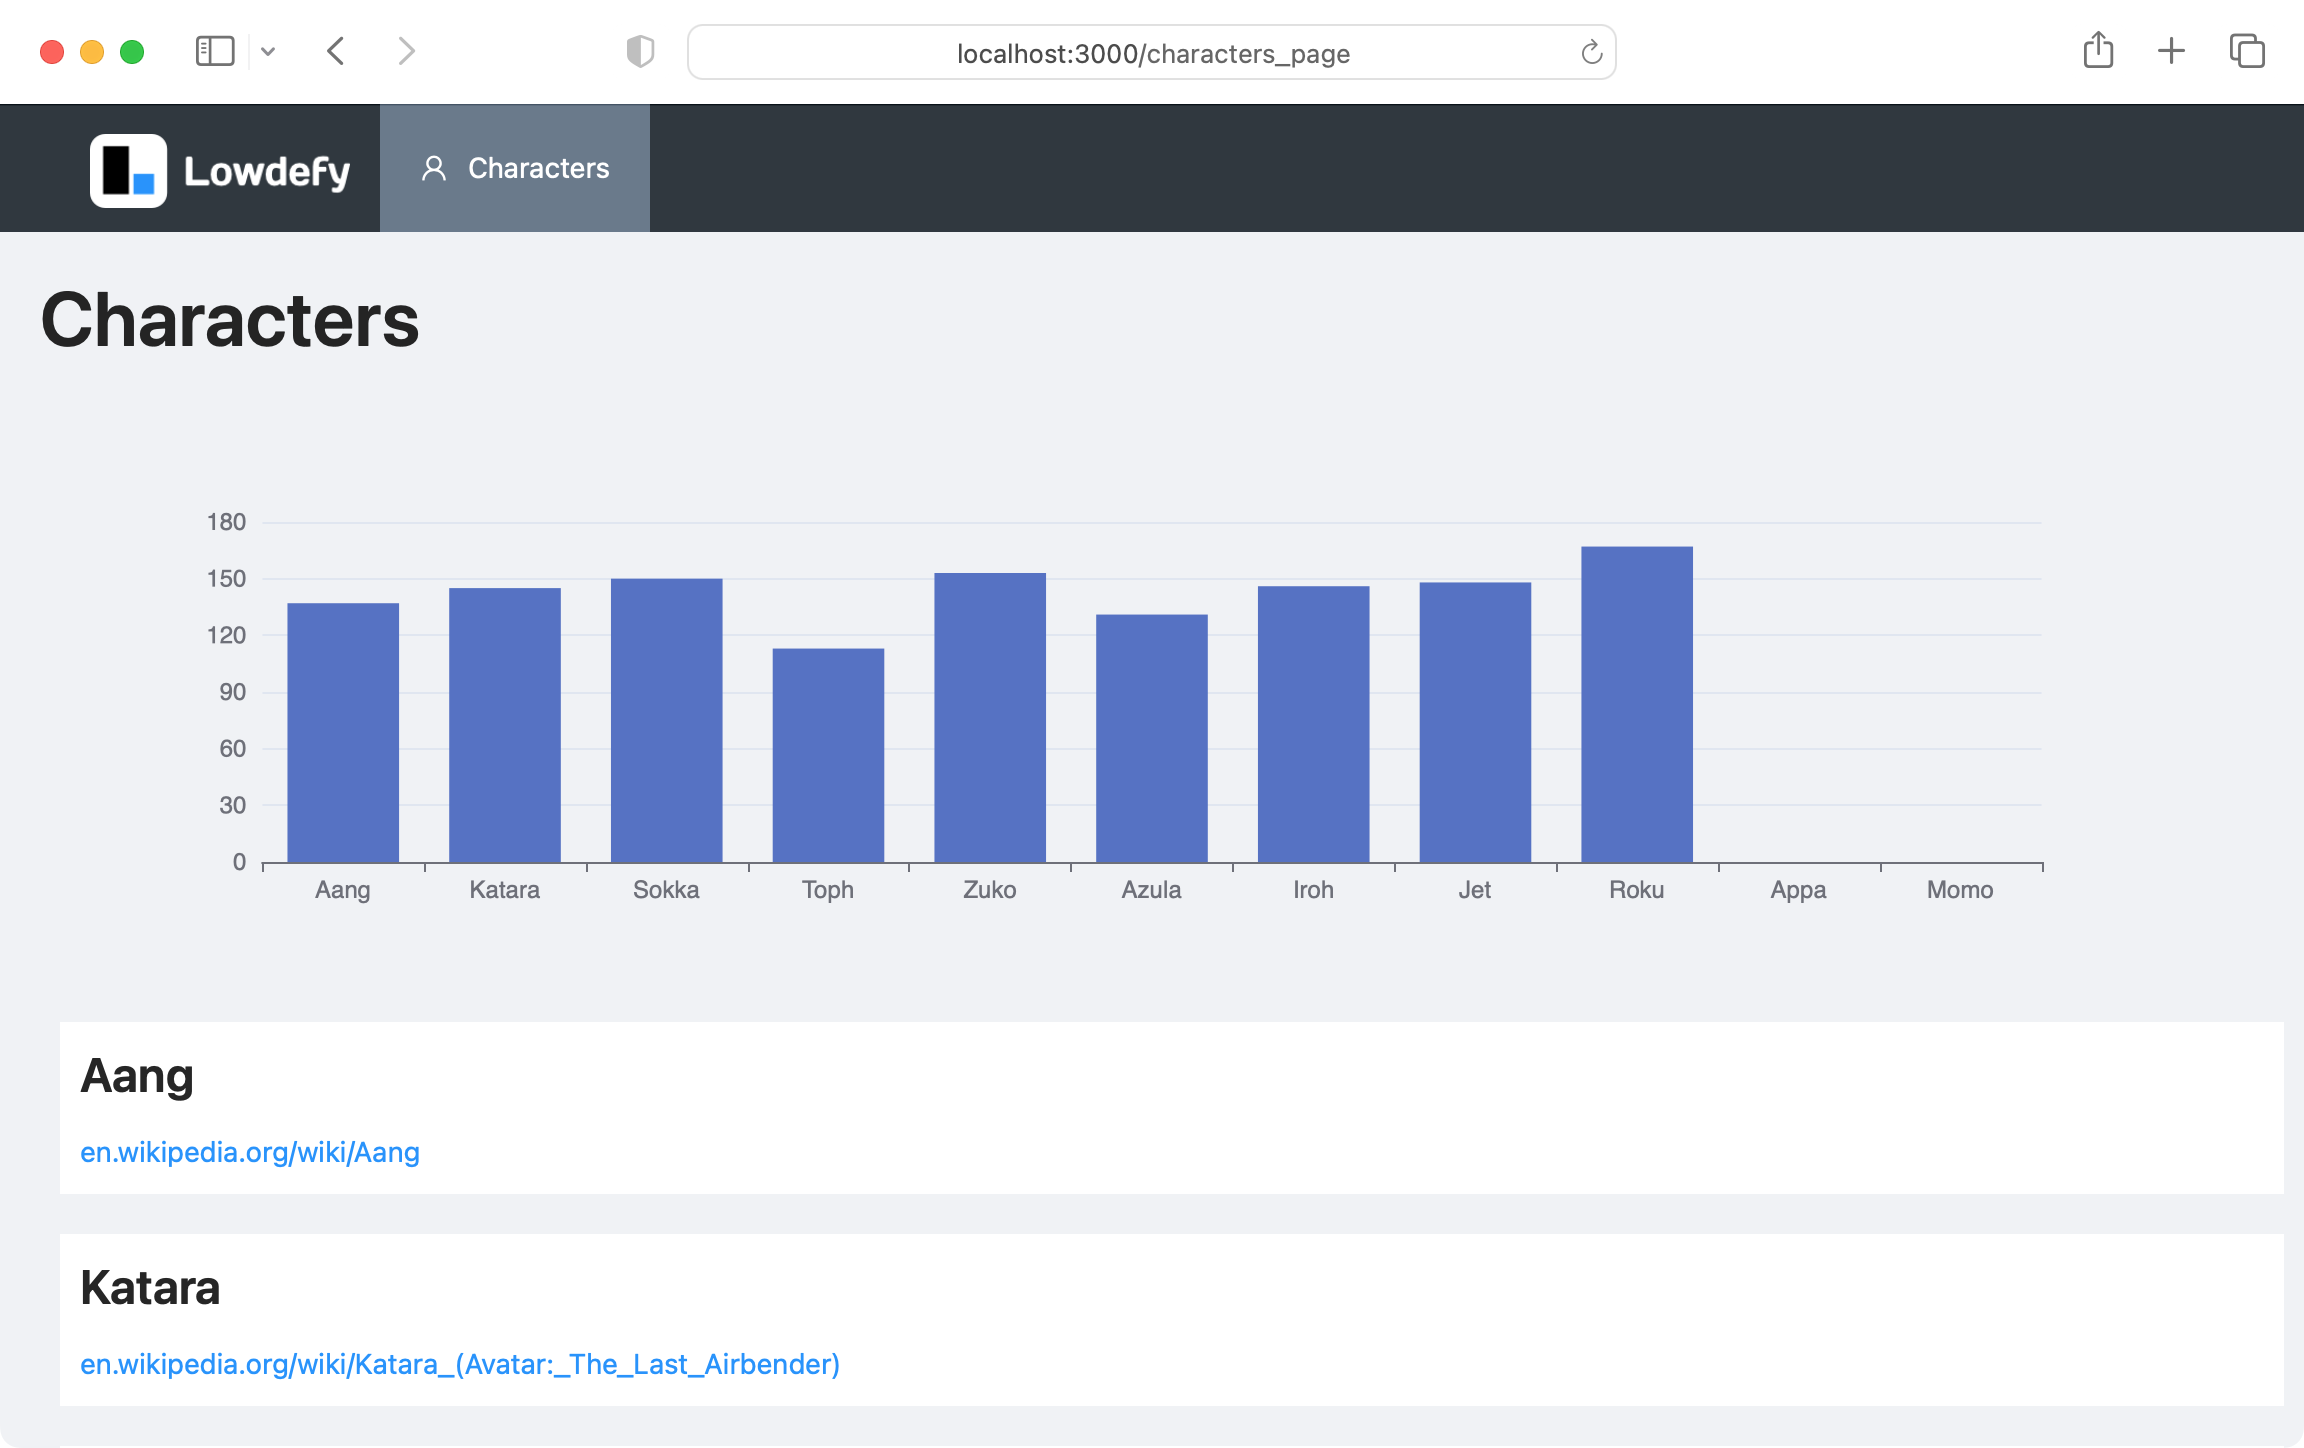
This is what the final dashboard will look like:
Since we're using the example database at airsequel.com/dbs/avatar_the_last_airbender, there is no initial database setup necessary. But feel free to use your own database since the concepts should be straight forward to apply.
Creating the Lowdefy App
The final code is also available in our example apps repsoitory.
Create a new directory with the boilerplate code:
mkdir lowdefy-todo-app
cd lowdefy-todo-app
npx lowdefy@latest init
Start the development server:
npx lowdefy@latest dev
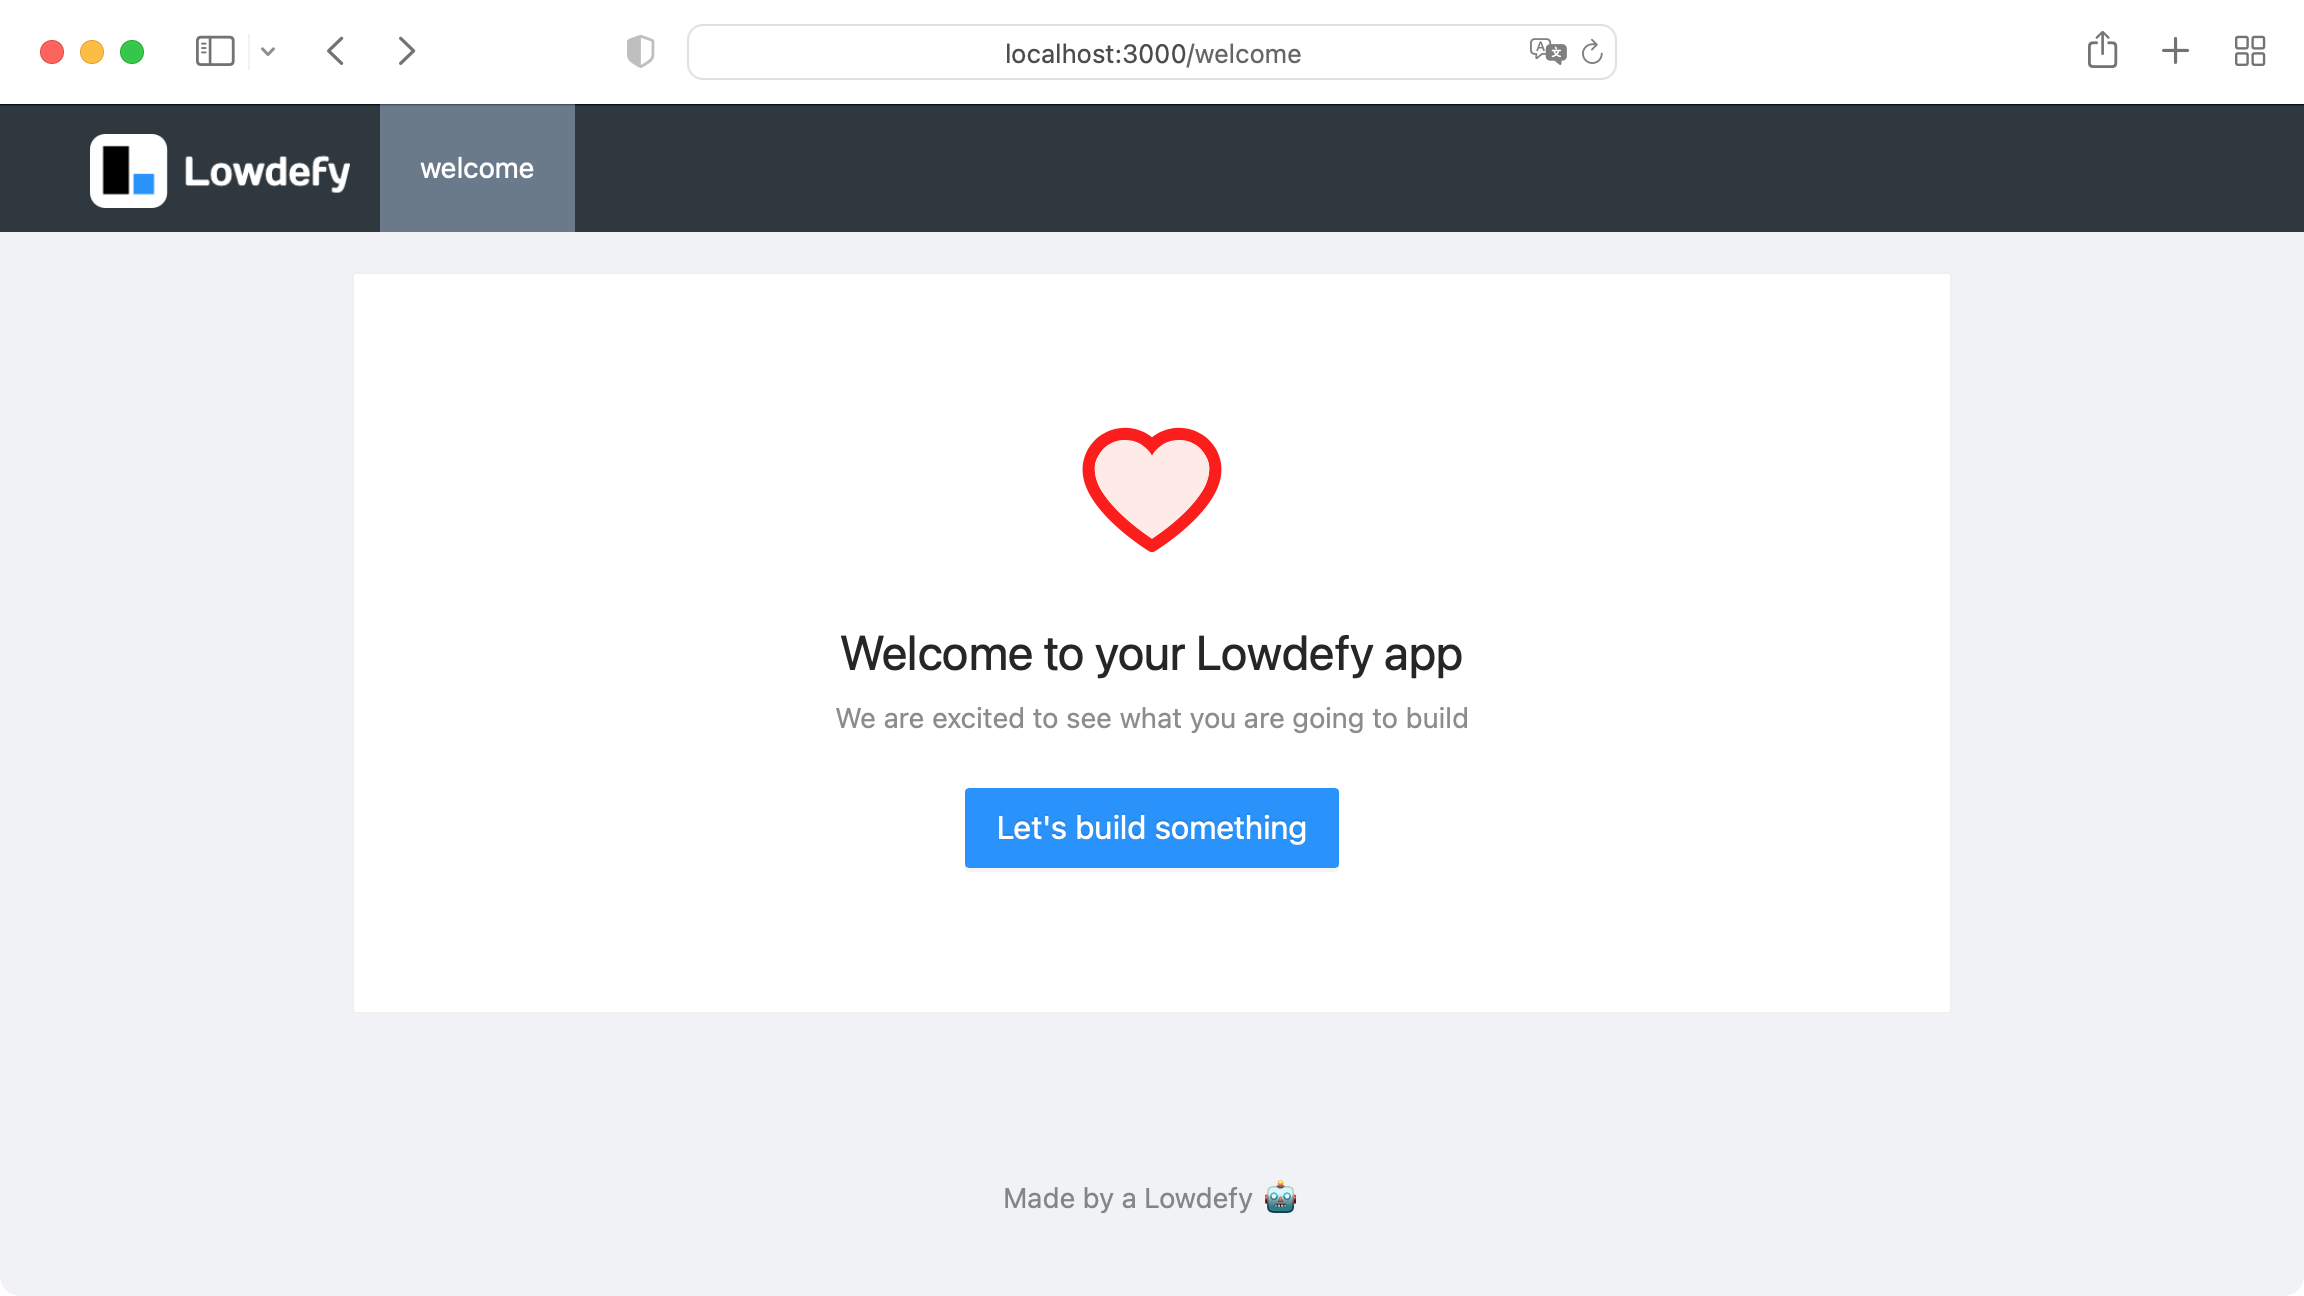
You should now see the welcome screen running at localhost:3000/welcome:
Since Lowdefy does not have a dedicated GraphQL connector yet (https://github.com/lowdefy/lowdefy/issues/298), we simply use the more generic AxiosHttp module to make the necessary HTTP POST request.
Therefore add following block right below the name: … line:
connections:
  - id: graphql_api
    type: AxiosHttp
    properties:
      baseURL: https://<your-company>.airsequel.com
In order to render our dashboard, replace now the pages: block with following code:
pages:
  - id: characters_page
    type: PageHeaderMenu
    properties:
      menu:
        links:
          - pageId: characters_page
            type: MenuLink
            properties:
              title: Characters
              icon: UserOutlined
    requests:
      - id: characters_request
        type: AxiosHttp
        connectionId: graphql_api
        properties:
          url: /dbs/avatar_the_last_airbender/graphql
          method: post
          data:
            query: |
              query GetCharacters {
                characters {
                  name,
                  height_in_cm,
                  wikipedia
                }
              }

    events:
      onEnter:
        - id: fetch_characters
          type: Request
          params: characters_request

        - id: set_characters
          type: SetState
          params:
            character_list:
              _request: characters_request.data.data.characters

    blocks:
      - id: title_main
        type: Title
        properties:
          content: Characters

      - id: block_id_$
        type: EChart
        properties:
          option:
            dataset:
              source:
                _state: character_list
            xAxis:
              type: category
            yAxis:
              type: value
            series:
              - type: bar
                encode:
                  x: name
                  y: height_in_cm

      - id: character_list
        type: List
        blocks:
          - id: character_container_$
            type: Box
            style:
              background: white
              margin: 10
              padding: 10
            blocks:
              - id: character_title_$
                type: Title
                properties:
                  level: 3
                  content:
                    _state: character_list.$.name

              - id: character_anchor_$
                type: Anchor
                properties:
                  newTab: true
                  title:
                    _string.replace:
                      on:
                        _state: character_list.$.wikipedia
                      regex: "https://"
                      newSubstr: ""
                  href:
                    _state: character_list.$.wikipedia
And voila, you have a simple, yet effective dashboard! 🥳
You can now check out the Lowdefy Documentation for more blocks to spruce it up!