In this tutorial we will be building a very simple todo app with Lowdefy. It will load the todos via GraphQL from a SQLite database hosted on Airsequel.
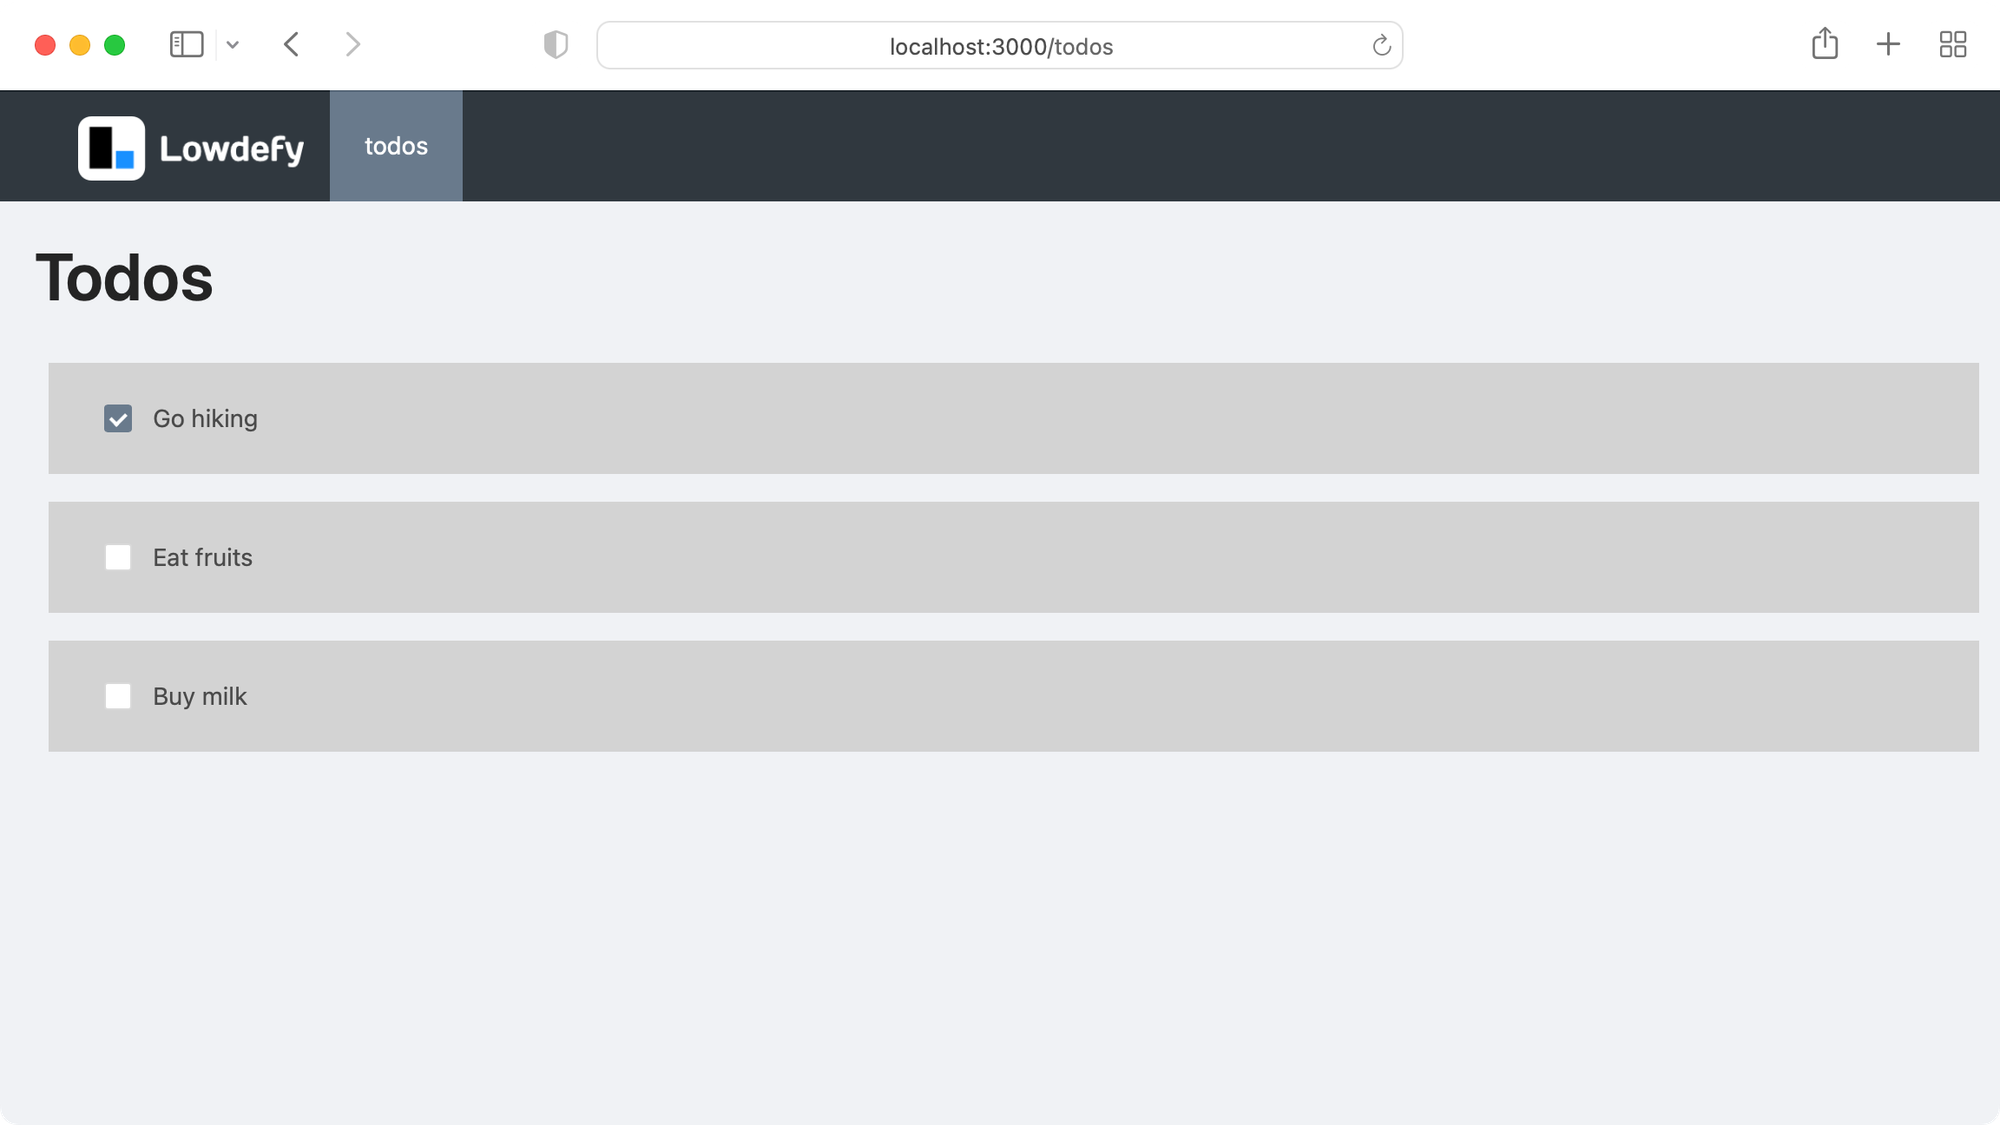
This is what the final app will look like. Not pretty, but functional!
If you find any problems in this tutorial, please feel free to leave a comment!
Setting up the Airsequel Database
Things to know:
- As the primary key we use the automatically generated
rowidcolumn.
First, let’s create the todo database in Airsequel’s UI. If you’re on Airsequel Enterprise you can alternatively use following steps:
Alternative way for Airsequel Enterprise: Upload an existing SQLite database
Or build it up from scratch:
- Go to airsequel.com (or your custom Enterprise instance)
- Click on “Create New SQLite Database”
- Rename database to “todos”
- Go to the “Tables” tab
- Rename “table_1” to “todos”
- Rename column “name” to “title”
- Add a new column “completed” with type “Boolean” and activate “Not Null”
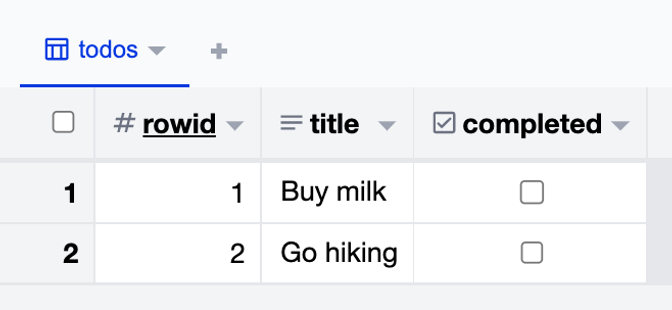
- Create a few todos like “Buy milk” and “Go hiking” to make working with it easier
🎉 Your database and the corresponding GraphQL endpoint are now ready!
It should look something like this:
Creating the Lowdefy app
- Create the directory and the boilerplate code:
shellmkdir lowdefy-todo-app
cd lowdefy-todo-app
npx lowdefy@latest init
- Start development server:
plain textnpx lowdefy@latest dev
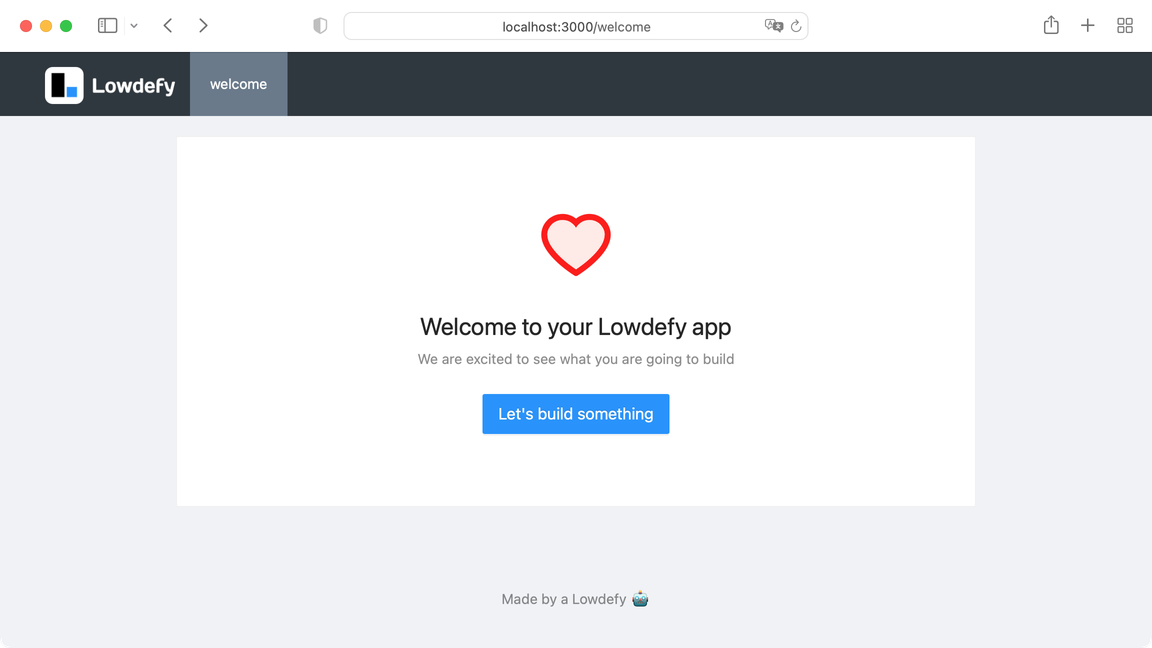
You should now see the welcome screen running at localhost:3000/welcome:
Since Lowdefy does not have a dedicated GraphQL connector yet (github.com/lowdefy/lowdefy/issues/298), we simply use the more generic
AxiosHttp module to make the necessary HTTP POST request.
Therefore add following block right below the name: … line:
yamlconnections:
  - id: graphql_api
    type: AxiosHttp
    properties:
      baseURL: https://<your-company>.airsequel.com
In order to render our todos, replace now the
pages: block with following code and replace <database-id>with your database id from database setup step.yamlpages: - id: todos type: PageHeaderMenu requests: - id: todos_request type: AxiosHttp connectionId: graphql_api properties: url: /dbs/<database-id>/graphql method: post data: query: "{ todos { title, completed } }" events: onEnter: - id: fetch_todos type: Request params: todos_request - id: set_todos type: SetState params: todo_list: _request: todos_request.data.data.todos blocks: - id: title_main type: Title properties: content: Todos - id: todo_list type: List blocks: - id: todo_container_$ type: Box style: background: LightGray margin: 0.5rem padding: 1rem 2rem blocks: - id: todo_list.$.completed type: CheckboxSwitch layout: size: 2em align: middle properties: label: disabled: true - id: todo_title_$ type: Span layout: grow: 1 align: middle properties: content: _state: todo_list.$.title
Now, the complete file looks like this:
The next steps in this tutorial will be added soon!
In particular: Writing, updating, and deleting todos